

This week in the Intro to Digital Photography Class, we spent the majority of our time covering composition, and depth of field.
We also covered metering modes, Camera Dial settings, and went over recaps and questions from last week’s lesson.
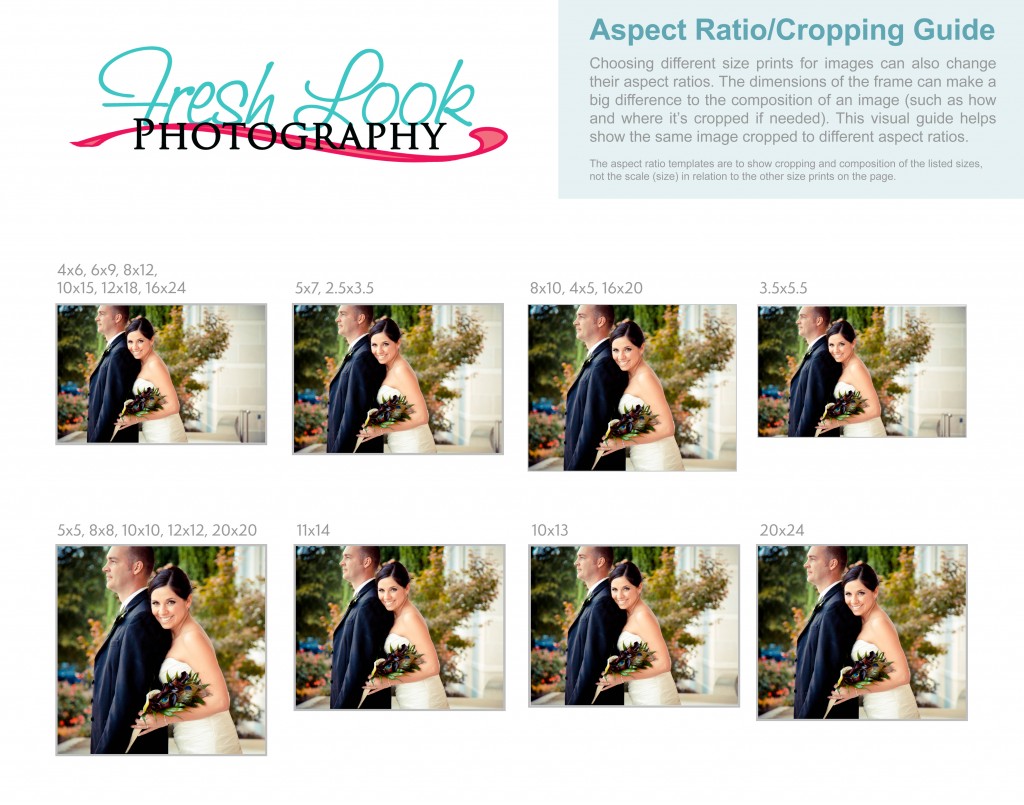
Below is a visual tool to help you see what different sizing would do to the image you have printed.
Intro to Digital Photography – Week 2 Recap
Metering Modes and their functions (p. 122)
~ Remember for this class we will live in Evaluative/Matrix Metering Mode
Camera Dial Modes
- Auto = Fully auto the camera does all the work and you’re playing Russian Roulette
- P = partial auto the camera allows you to set things like the ISO but controls the shutter speed and aperture
- AV / A (depending on camera model) = Aperture priority you set the aperture and the camera sets the shutter speed
- TV / S (depending on camera model) = Shutter priority you set the shutter speed and the camera sets the aperture
- M = fully manual you make all the decisions
Here’s a good description of the mode dial settings as well as the scene selection settings.
Composition
Things to consider include:
- Horizontal or vertical
- Perspective
- Subject
- Simplify
- Negative space
- Lines
- Visual Weight
- Fill the frame
- Motion
- Depth of Field
We talked about the Rule of thirds (think of your viewfinder as a tic tac toe board) and how it affects the composition and feeling of a photograph. We also talked about shallow depth of field and how it is used to isolate a subject from it’s surroundings. Also, how there are a combination of things that are needed to achieve the correct effect.
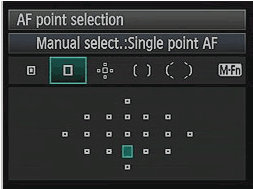 Moving Your Focal Point
Moving your focal point around in the frame will provide greater sharpness in your images and allow you to put the focus on exactly what you want in the frame.
Here’s a great article on moving your focal point in the frame.
Please Note: This is not changing to lens to manual focusing. We will still be shooting with your lens in autofocus, I just want you to learn to choose and move your focal point – which you can do on auto focus.
.
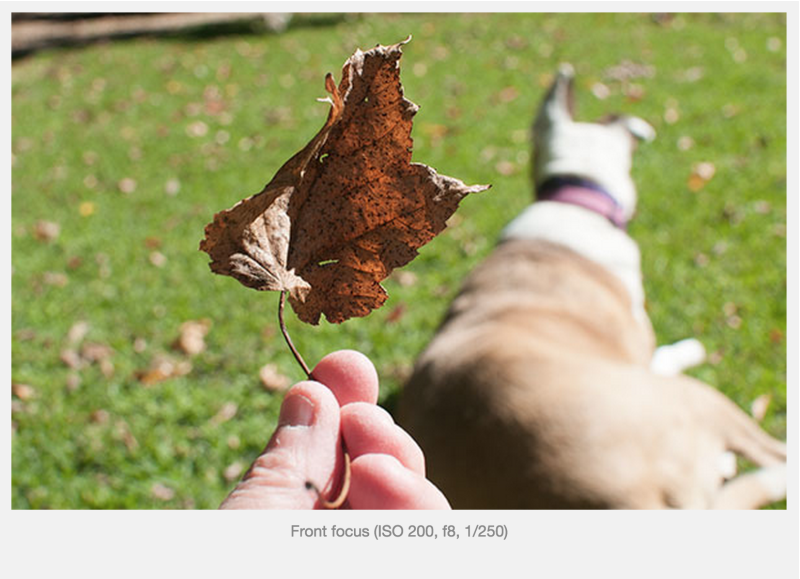
Depth of Field
Photographers use depth of field (DOF) to isolate their subjects and throw a distracting background out of focus (p. 42). To create a nice blurriness/bokeh behind your subject you’ll need to use a combination of the following…
- Use a long Lens (70mm – 85 mm and higher)
- Have a wide aperture/f-stop (1.2, 1.4, 1.8, 2.0, 2.8, 3.5)
- Get close to the subject
- Keep your subject away from the background
Here’s a link to an article with some good information on achieving shallow depth of field.
A nice slideshow on composition by Marlene Hieleme of the ImageMaven blog.
.
Homework
 Reading – Please read the Chapter on Aperture in our textbook.
Homework Assignment Part One
Take your everyday object and, using what you learned about composition and depth of field in in class, re-shoot it to make it look more interesting. Take a bunch of shots from different angles and different lighting. I also want you to see how you can use depth of field (DOF) to enhance your subject. Pick out 1 of your best shots and have it printed for class next week. Don’t forget to bring your original photo as well so we can look at them side by side.
.
Homework Assignment Part Two
Depth of field: I want you to pick two objects, stuffed animals, potted plants, etc. They must be at least 12″ tall. No miniature objects, no people or pets, and set then up outside on bench or table.
- Try not to shoot in bright midday sun. Early morning or late afternoon light is good as well as bright open shade (**see definition below).
- If you have one, use your longer zoom lens for this assignment. Zoom in on your front object or physically get in close.
- Make sure your items are spaced approx 3′-4′ apart and that you position yourself and camera so you can see both the front and back item.
- Set your ISO for the lighting conditions. 200 for a sunny day. 400 an overcast day or a shady area. Don’t be afraid to chose a higher ISO if you need to! You want to make sure that you aren’t letting your shutter speed get too low.
- Zoom in on your front object.
- Set your aperture/f-stop to to your widest aperture for your zoom setting. Zero out your meter with the shutter speed and take the shot. Your front object should be in focus and your back object should be blurry.
- Without moving your camera position, focus on the back object. If your light looked good in the first shot you shouldn’t have to change your settings. Take another shot.
- Again, without moving your camera position, set your f-stop to a small opening. 16 or 18 should be fine. Focus on one of the objects, zero out your meter with your shutter speed and take another shot. Both your objects should be in focus. If not, set your f-stop to 22, 28 (or higher), re-zero out your meter and take another shot.
Print all 3 shots and bring them to class next week along with your reshot everyday item.
Here is an examples of the depth of field assignment:
.
Front Object In Focus

.
Back Object In Focus

.
Both Objects In Focus

.


Leave A Comment