

Week 3 in our class is all about lighting and portraits and how to create an image that tells the viewer something about you (or the person you are photographing).
If you missed Week 2, you can catch up here.
This week we reviewed the exposure triangle: ISO, Aperture, Shutter Speed, DOF, the Rule of Thirds, and Composition.
We went over again how to move the focus points on your camera and why that is so important.
Really helps nail your focus!
We our class time watching a slideshow about lighting and portraiture.
.
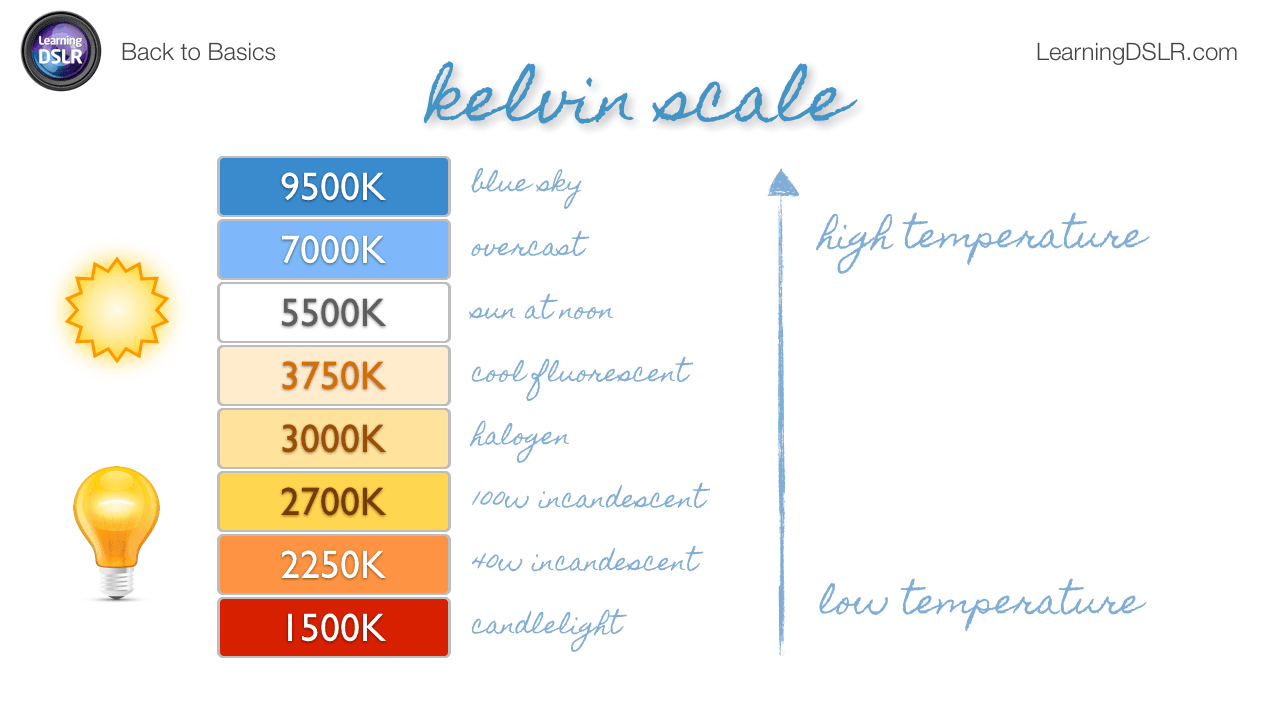
White Balance/Kelvin Temperature
The Kelvin temperature scale in photography measures the color temperature of light sources, ranging from warm (lower Kelvin values) to cool (higher Kelvin values).
Lower values, around 2000-3000K, produce warm, orange-toned light (like candlelight or tungsten bulbs).
Higher values, around 5000-6500K, create neutral to cool, blue-toned light (like daylight or overcast skies).
Understanding Kelvin helps photographers achieve accurate white balance, ensuring colors appear natural in different lighting conditions.
.
.
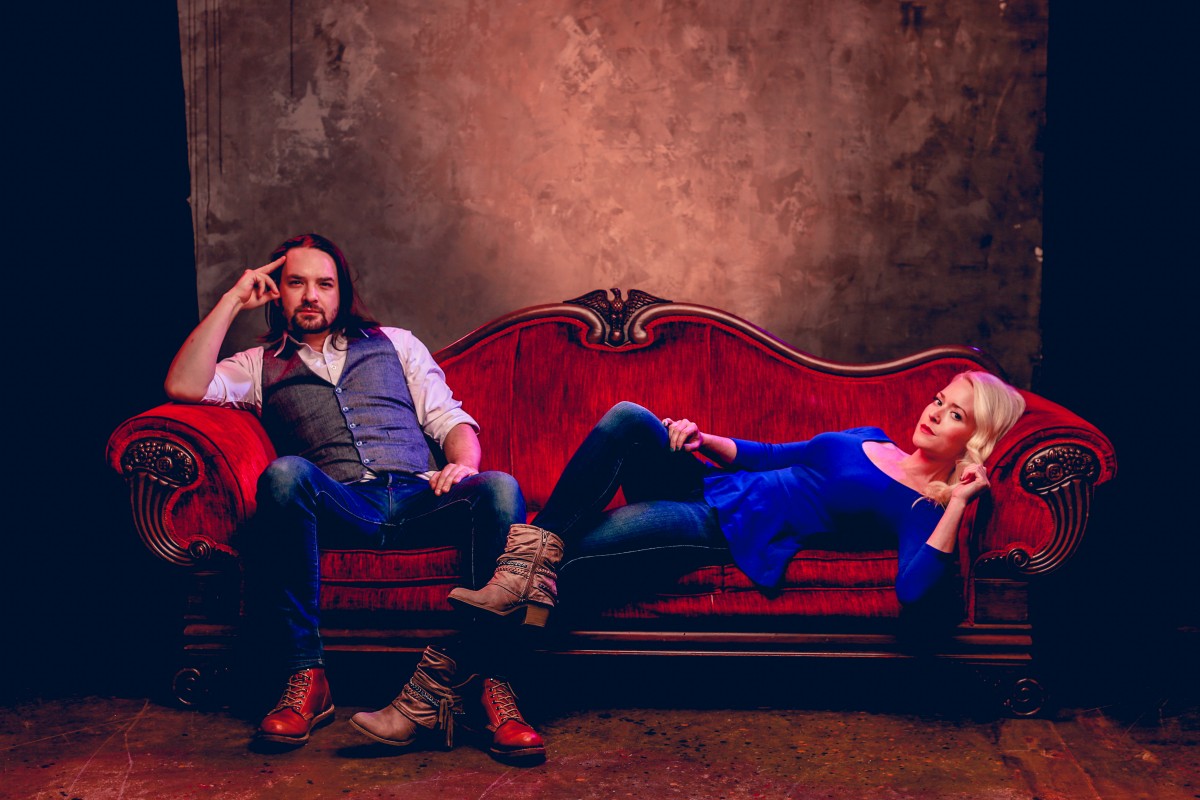
Lighting and Portraits
We watched this video over on the Strobist site about street portraiture by photographer Clay Enos.
Our main focus for this class was lighting, and how we can best use it in our images.
There are different factors to consider:
- Deciding what the quality of the light is
- Determining what the quantity of the light is
- What mood you want to create
- If you need to modify the light
- Lighting for portraiture.
- Where you place your subject (Putting your subject just inside a doorway/garage/window on a sunny day)
.
Lighting Tips
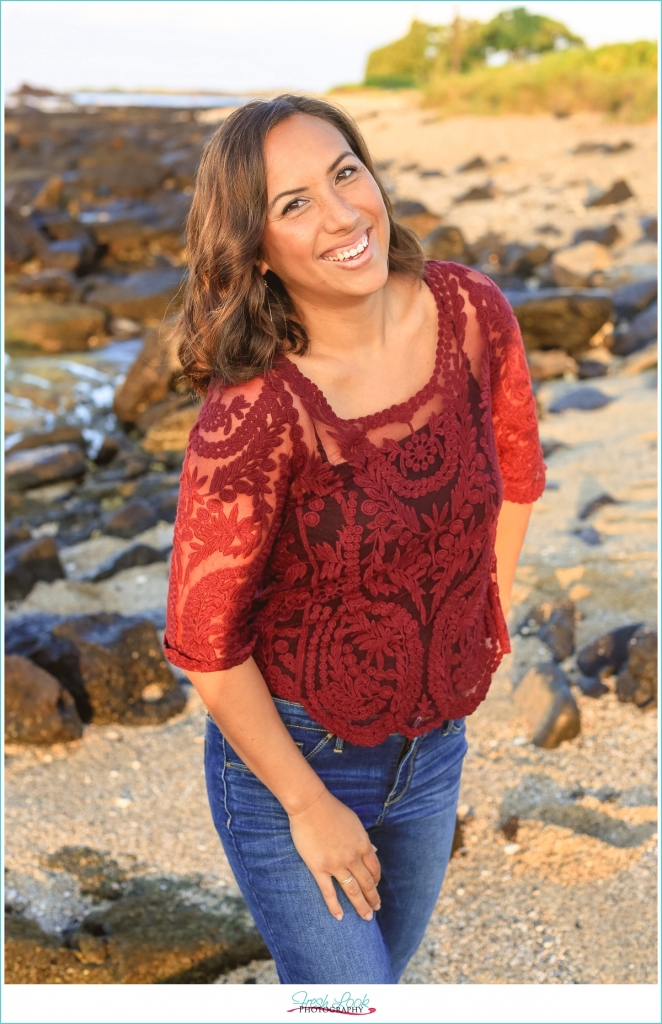
A lot of the time we are photographing indoors – this article outlines using natural light to your best advantage.
Tying in with our lesson on lighting and portraits, here’s how to see the light for portraits.
Here a great link to photographing in low light situations without using your flash.
Getting great natural lighting doesn’t have to be hard, as this article proves!
.
Homework
Reading – Please read the chapter on Light
.
Portrait – Part of your assignment for this week is to shoot a portrait of a someone (no pets, no kids, no significant others). Don’t just set the camera up and take a snapshot. Use some of the lighting and composition techniques that we talked about. Create a mood and tell us something about your subject as well as yourself with your photos. Think about using your sitters environment as part of their portrait. (See TIPS below)
Bring in at least one photo of your subject.
Self-Portrait – You were also asked to take a self portrait (which will require that you learn how to use the self timer feature on your camera).
For ease of focusing, think about putting your lens on manual focus mode
Try using your zoom lens set on a wide setting such as 18 or 25mm. See if that makes a difference in how you view your subjects. The object is to interact with your subject.
Play with your camera settings a bit and see where it takes you. Be creative.
Bring in at least one self portrait.
Here’s an AWESOME step-by-step guide for taking a self portrait, check it out!
.
 Portrait Tips
One of the best and most underused locations for portraiture is an ordinary garage or doorway.
Open the door and position the subject in the shadow near the edge of the light.
Make sure the lights are out behind them and there is no window in the background, If necessary, hang a backdrop behind the subject to cover up all the clutter.
The garage creates a box, which protects the subject from direct sun. The sky adds a sparkle to their eyes. In a sense a garage door opening is like a big window without glass. And if the driveway or sidewalk is a light-colored concrete, it can act as a reflector bouncing the fill light back in.
If you don’t have a garage, any overhang will do. Experiment with positioning your subject closer and farther from the shadow’s edge until you find the right combination.
Try using a small step ladder or stool so that you can position the camera just above the subject’s head. This will cause him to look up so that the light from the sky will brighten his eyes.
Do some pre-planning to keep your portrait sessions short, no more than 10 to 15 minutes.
Here are some self portrait tips to get you started.
And a few more ideas to get your creative juices flowing.
.
Try to think creatively when taking your homework portraits this week.
Posing people can be hard, here’s how to help them relax.
We’re not taking pictures of kids for this class, but it’s definitely an art all in itself!
The self portraits of Vivian Maier. I love her photos because she used reflections very creatively.
Check out the portfolios of Joe McNally for some great examples of portraits.
Here’s a good explanation of environmental portraiture.
Also check out these self portraits on Google.
.
I hope all these tips and tricks for lighting and portraits are helping you in your photography journey!


Leave A Comment